Thursday, July 9, 2015

How To Install CloudyG2 3.3 (All Models)

root with AutoRec, if no root, click here to root!

*******Must install KK Bootloader*******

CloudyG2 3.3

I am not responsible for your device getting bricked if following the instruction incorrectly, you are at your own risk and agree to this statement.

----------------------------------------------
2nd
Download theses files but make sure you know the download location!

Step 1:
BOOTLOADER KK!
Click Here
Do
Download the kk/image to your model


choose your correct phones model. if you don't know it go into your setting or look on back of phone, choosing the wrong one will brick your devices and will need to flash the stock rom, if you do brick it you can install stock rom here
Step 2:
Updated TWRP
D800: here
D801: here
D802/5/6: here
D803: here
LS980: here
VS980: here


Step 3:
CloudyG2 3.3
Direct Download: here
Download Torrent: here
Source: Cloudyfa
3rd
Reboot into recovery mode (see video for QuickBoot app) and click on
Wipe
Advanced Wipe
Check: Dalvik, System, Data, Cache ONLY
4th
Go to install and search for the Bootloader zip file your downloaded and tap install
5th:
Go back to install and search for CloudyG2 3.3.zip file that your downloaded and tap install
6th
YOUR ARE FINISHED, ENJOY!


Full UX 4.0 ported

Aroma installer

SuperSU

Busybox + runparts

init.d support

Debloated

AdAway host file

Latest GApps

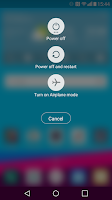
G4 power menu

G4 keyboard

Full weather animations

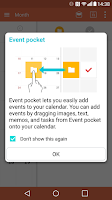
Calendar with Event Pocket

Multi-User

Split view / Mini view

Advanced camera driver

Calling recorder

Patched LGSmartWorld

Advanced QRemote

ViPER4Android


Improved weather animations
Fixed hiding feature in Gallery
Scale navigation bar to 38
Advanced QRemote
Minor bugs fixed
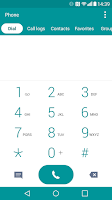
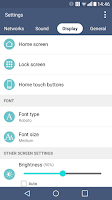
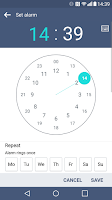
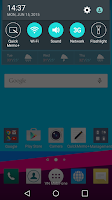
Screenshots
  
 Source: XDA


Saturday, November 29, 2014

How To Jailbreak iOS 8.1.1 Untethered With Taig


Pre-requisites:
  • Turn off any lock screen passcode or Touch ID. You can do this by navigating to: Settings > General > Touch ID & Passcode > turn off Simple Passcode.
  • Turn off Find My iPhone by navigating to: Settings > iCloud > Find my iPhone.
  • Restore to iOS 8.1.1 via iTunes. OTA updates usually don’t work well with jailbreaks. LINKS BELOW
  • Backup your device using iCloud or iTunes.
  • Supported devices:
    • iPhone 6 Plus
    • iPhone 6
    • iPhone 5s
    • iPhone 5c
    • iPhone 5
    • iPhone 4s
    • iPad (2, 3, 4, Air, Air 2, mini 1, mini 2, mini 3)
    • iPod touch 5
  • Supported firmwares:
    • 8.0
    • 8.0.1
    • 8.0.2
    • 8.1
    • 8.1.1
    • 8.2 beta
----------------------------------------------------------------------------------------------------------------------------------
How to jailbreak iOS 8.1.1 on Windows:
Step 1: Download TaiG jailbreak for Windows from here.
Step 2: Connect your iOS device via USB, and run TaiG.
Step 3: Uncheck the second option below Cydia to prevent installing TaiG app store.
Step 4: Now click on the big green button in the center to start Jailbreak.
Step 5: TaiG will now jailbreak your iOS device. Do not disconnect your iPhone, iPad or iPod touch during the jailbreak process. Once the jailbreak process is complete, your iOS device will reboot and you will have Cydia installed on the home screen. It’s that simple!
Source: Redmondpie


Monday, November 17, 2014

How To Install Lollipop 5.0.1 - 5.0.2 Moto G (2nd Gen) (All Variants)

Download Your Phone Model and save to Internal Storage!

XT1063 5.0.1 UPDATE: 22.21.25 Download Here

XT1064 5.0 UPDATE 21.11.17 Download Here

Please note, you must be on 5.0 before installing 5.0.1.
XT1064 5.0.1 : Download Here

XT1068 - 5.0.2 Download Here
(thanks to Rajesh Kumar)

Power Off
Hold Volume Down + Power
Scroll Down "Recovery" (select with volume up)
"Choose update from SDCard"
Browser File Downloaded and select


INSTALLATION DOES TAKE AROUND
 10-15 MINUTES!
STEP BY STEP VIDEO BELOW
Source: XDA

How To Unbrick/Unroot Moto G (2nd Gen) - Flash Stock 4.4.4

Motorola Firmwares Click here
Android Studio (also know as Andorid SDK): Click here
Unlock Bootloader: Click here

Copy and Paste to command prompt (in order watch video below!)
fastboot.exe flash logo logo.bin
fastboot.exe flash boot boot.img
fastboot.exe flash recovery recovery.img
fastboot.exe flash system system.img_sparsechunk.0
fastboot.exe flash system system.img_sparsechunk.1
fastboot.exe flash system system.img_sparsechunk.2
fastboot.exe flash system system.img_sparsechunk.3
fastboot.exe flash modem NON-HLOS.bin
fastboot.exe erase modemst1
fastboot.exe erase modemst2
fastboot.exe flash fsg fsg.mbn
fastboot.exe erase cache
fastboot.exe erase userdata


Tuesday, September 23, 2014

How To Root LG G2 (Kit Kat 4.4.2) All Variants / Install CloudyG3 ROM

UPDATE 7-9-15
INSTALL UPGRADRED VERSION v3.3


Things you need:
Root
AutoRecovery
CloudyG3 v.3.3
LG G2 (Any Variants)
How To Root Video
Step 1:
    Root your LG G2: TowelRoot (if it won't download & opens a lot of tabs, click on my DropBox link.)
Download via Dropbox

Step 2
    Download your recovery file depending on which carrier G2 you got. 
Note:
Please note that AutoRec – KitKat Recovery Installer downgrades your phone’s KitKat bootloader to the older replaceable bootloader that allows installing a custom recovery. Replacing any of the partition on your LG G2 might prove risky. Install the app at your own risk!

Download:

AutRec app can install TWRP Recovery version 2.7 on the following models of the LG G2:

AT&T LG G2: D800_AutoRec.apk

T-Mobile LG G2: D801_AutoRec.apk

International LG G2: D802_AutoRec.apk

LG G2 D802T: D802T_AutoRec.apk

Sprint LG G2: LS980_AutoRec.apk  (some users reported white lines issue after using AutoRec)

Canadian LG G2: D803_AutoRec.apk

Latin American G2 D805: D805_AutoRec.apk

Verizon LG G2: VS980_AutoRec.apk

Korean Models:

Just grab the appropriate AutoRec – KitKat Recovery Installer and flash the TWRP recovery right now.

Fixing White Line Issue After Flashing TWRP

If you have used AutoRec on your Sprint LG G2 and facing white lines issue or if you have Korean model F320 and have lost Knock On, here’s a solution for you. Download the patched Kernel file for your LG G2 model from herecopy the KK_Kernel_XXX_jdi.zip to your phone and flash the file in TWRP recovery. If you do not know how to flash files in TWRP, follow Steps 4-7 from this guide.
Source: DroidViews

How To Install CloudyG3 ROM
Step 3
Download CloudyG3 3.3 via XDA direct download (1.3GB)
Read about ROM here

Step 4
Transfer the .zip file to your phone internal memory.

Step 5
Download Quick Boot (Reboot) via Play Store then click Recovery and grant permission. Should reboot into recovery automatically.
Manually
Power off phone and boot into recovery. 
(Power + Down Button) Once you see the LG logo, let go of power + down and press again hold it again.

Step 6: Back Up Existing ROM
Inside TWRP
(Backup > select only Boot, System, EFS> Swipe to Back Up

Step 7
Install CloudyG3 3.3 zip

Step 8
TWRP > Wipe > Swipe to Factory Reset

Complete.
                                                     

Friday, March 7, 2014

How To Install Milk Music On Any Android Device


Download: Samsung Milk Music APK: https://www.mediafire.com/?7p2e6rsg2in4o2o
Directions
1. Open Root Brower (or any root explorer you have)
2. /System/build.prop
3. ro.product.model=Galaxy S4
ro.product.brand=Samsung
ro.product.manufacturer=Samsung
4. Save
5. Reboot Device
6. Open Milk Music
7. Enjoy

How To Install Windows 8.1 Update 1

 
Download Files: http://goo.gl/U94Bsb
 
 
Top Key Changes To Windows 8.1 Update 1


Thursday, February 20, 2014

How To Root LG G2 & LG Flex (All Variants)


UPDATED VIDEO AS OF SEPT. 2014!!
http://kevinwithtech.blogspot.com/2014/09/how-to-make-lg-g2-look-like-lg-g3.html

^^^^^^^^^^^^^^^^^^^^^^^^^^^^^^^

---------------SCROL DOWN FOR OLD---------------

Updated - ioRoot23
(.zip password: kevinwithtech
 LG Drivers


-----
(Use video above for better simple instructions)


Manuel Directions:
Confirm your device is supported below.

Download latest IOroot zip and extract it. 

Set phone in USB Debugging mode. 

Set USB mode to Charging only(this may vary based on model). 
Verizon users need to set USB connection to "Ethernet" mode

Confirm device is detected in ADB using "adb devices" command. 
Be sure to accept the RSA prompt on your phone.. and check the "always" box as well. 

Run script and follow the onscreen instructions. 

If the script is stick at "waiting for device".. turn your phone screen on and unlock it.. make sure ADB has the proper permission and that the ADB RSA prompt isn't sitting on the YES/NO screen. Check the "always remember" box when you accept it!!!

Windows: Download and install proper ADB driver. Double-click on root.bat
Linux: cd into IOroot folder -> chmod +x root.sh -> ./root.sh
Mac: cd into /IOroot/mac folder -> chmod +x root.sh -> ./root.sh

Device Model and Firmware Supported:

LG Optimus G - All

LG G2:D800 - D80010d/D80010o
D801 - TMO(all), CLR(all), WND(all), VTR(all)
D802 - all
D803 - all
D805 - all
D806 - all
F320K (Shipping ROM)
F320K - F320K20a/20f
F320L (Shipping ROM)
F320L - F320L20b/20e
F320S (Shipping ROM)
F320S - F320S20a/20g
Sprint LS980 - All
Verizon VS980 - All

LG G Flex:F340 series - All
D950 - All
D955 series - All
D958 series - All
D959 - All